How to Position Your Speakers for the Best Performance in Your Room

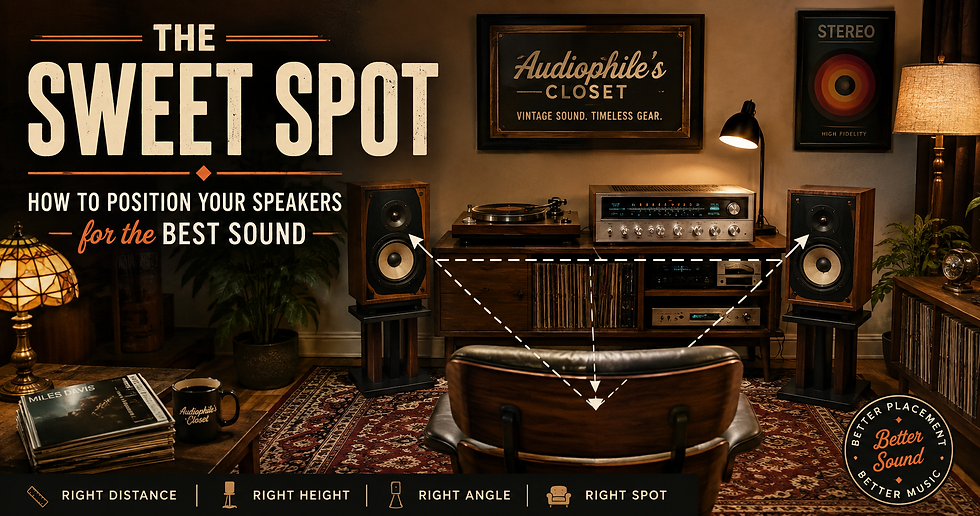
You can own a great amplifier, a beautiful vintage receiver, and a pair of speakers capable of incredible sound—but if those speakers are sitting in the wrong place, you may only be hearing a fraction of what your system can really do.
The good news? Improving speaker placement doesn't cost a dime.
Moving a speaker a few inches away from a wall, changing its angle slightly, or raising it to the proper height can make a surprisingly dramatic difference in bass response, stereo imaging, clarity, and overall balance.
At Audiophile’s Closet, we're big believers that before you start replacing equipment, cables, cartridges, or amplifiers, you should first make sure the equipment you already own is being given the opportunity to perform properly.
Here's how.
Start With the Listening Triangle
One of the easiest places to begin is something called the equilateral triangle.
Imagine a triangle connecting your left speaker, right speaker, and your primary listening position.
If your speakers are approximately 7 feet apart, try sitting approximately 7 feet away from each speaker. It doesn't have to be mathematically perfect, but it's an excellent starting point.
Your goal is to create a convincing stereo image where vocals appear to come from the center—even though there isn't actually a speaker there.
When placement is right, you shouldn't hear two individual speakers.
You should hear a soundstage between them.
In a well-positioned system, instruments can appear across the width of the room, vocals can lock into the center, and some recordings can even create the illusion of depth behind the speakers.
That's part of the magic of a properly set-up two-channel stereo system.
Get Your Speakers Away From the Wall
This is one of the most common mistakes we see.
Many speakers—especially larger vintage models—end up pushed directly against the wall because that's where they fit conveniently.
Unfortunately, convenient placement isn't always good acoustic placement.
Walls reinforce low frequencies. Moving a speaker closer to the rear wall usually increases bass output, while moving it farther into the room generally reduces that reinforcement and improves bass definition.
If your speakers sound boomy or muddy, try pulling them farther away from the wall.
A good starting point is roughly:
12–24 inches from the back wall
Depending on the speaker and the room, 24–36 inches may sound even better.
Don't be afraid to experiment.
Moving a speaker just 3 or 4 inches can sometimes noticeably change the bass response.
Corners Can Create Too Much Bass
Corners reinforce bass even more dramatically because the speaker is interacting with multiple room boundaries.
This can make a speaker sound powerful—but powerful isn't necessarily accurate.
If your system has bass that seems exaggerated, muddy, or concentrated around certain notes, check whether your speakers are too close to the corners.
Moving them inward can clean things up considerably.
There are exceptions. Some speakers were specifically designed to work near walls or corners, so manufacturer recommendations should always be considered.
But for most conventional speakers, giving them some breathing room is a good idea.
Speaker Height Matters
The tweeters should generally be positioned close to ear level when you're seated.
Why?
High frequencies are more directional than bass frequencies. If the tweeter is considerably above or below your ears, the tonal balance and stereo image can change.
This is especially important with bookshelf and medium-size vintage speakers.
Putting a great speaker directly on the floor may produce more bass, but it can also place the tweeter far below the ideal listening height.
That's where a good speaker stand can make a major difference.
A stand isn't just furniture.
It places the speaker at a better listening height, provides a solid foundation, and can help reduce unwanted interaction between the speaker and floor.
For larger vintage speakers, even raising the cabinet 6–12 inches can sometimes transform the presentation.
Vocals move upward, imaging improves, and the entire soundstage can become more natural.
Experiment With Toe-In
Toe-in simply means turning the speakers slightly toward your listening position.
Start with the speakers facing straight ahead.
Listen to a familiar recording.
Then rotate each speaker inward slightly and listen again.
Increasing toe-in will often create:
A more focused center image
Greater vocal clarity
More precise instrument placement
Stronger high-frequency presence
Too much toe-in, however, can make the soundstage seem narrower or the treble overly prominent.
There's no universal setting.
Some speakers sound best pointing almost directly at the listener. Others perform better facing nearly straight ahead.
Your ears get the final vote.
Keep the Placement Symmetrical When Possible
Stereo depends heavily on timing.
If your left speaker is three feet from a side wall while your right speaker is six inches from another wall, each speaker will interact with the room differently.
Whenever possible, try to keep the speakers in reasonably similar acoustic environments.
That means similar distances from:
Side walls
The rear wall
Your listening position
Perfect symmetry isn't always possible in a real living room—and that's okay.
But getting reasonably close can improve stereo imaging substantially.
Don't Forget About the Room
Your speakers aren't the only things producing the sound you hear.
Your room is part of your stereo system.
Sound leaves the speaker, reaches your ears directly, and also reflects from the floor, ceiling, walls, windows, furniture, and everything else in the room.
A nearly empty room with hardwood floors, large windows, and bare walls can sound bright and echoey.
A heavily furnished room with carpet, curtains, couches, bookshelves, and upholstered furniture can sound considerably more controlled.
You don't necessarily need expensive acoustic treatments.
Normal household items can help tremendously.
Rugs, curtains, furniture, bookshelves, and upholstered seating can all help reduce excessive reflections.
Sometimes the best acoustic treatment is simply making the room feel like a comfortable place to live.
Watch the Floor
Hard floors can create strong early reflections.
If your speakers fire across hardwood, tile, or concrete toward your listening position, try placing a rug between the speakers and your chair.
Here's an easy test:
Sit in your normal listening position and have someone slide a mirror along the floor between you and the speaker.
Wherever you can see the speaker's tweeter reflected in the mirror is approximately where an early reflection occurs.
A rug in that area can help reduce it.
The same basic principle applies to side walls.
Don't Put Something Between the Speakers Unless You Have To
Large entertainment centers, cabinets, televisions, and furniture between speakers can affect imaging.
That doesn't mean your room has to become a dedicated recording studio.
Most of us actually live in our listening rooms.
But if possible, avoid having large objects extend significantly forward of the speaker cabinets.
Ideally, the front of your speakers should sit slightly ahead of surrounding furniture.
This helps reduce early reflections and gives the speakers a clearer acoustic path into the room.
Your Listening Position Matters Too
Speaker placement gets most of the attention, but where you sit is equally important.
One position to avoid is sitting directly against the back wall.
Bass tends to accumulate near room boundaries, which can make the system sound much heavier from that position.
If possible, move your chair or sofa slightly forward.
Even 12–18 inches can make a noticeable difference.
Also avoid automatically placing your listening chair exactly halfway between the front and back walls. The center of a room can sometimes coincide with strong bass cancellations.
Again, experimentation is the key.
Use Music You Know
You don't need expensive test equipment to improve your speaker placement.
Start with recordings you know extremely well.
Choose music containing:
Vocals – useful for judging center imaging.
Acoustic instruments – useful for judging tonal balance.
Bass guitar or upright bass – excellent for identifying boomy or missing bass notes.
Drums and percussion – useful for evaluating impact and transient response.
Well-recorded live music – excellent for judging soundstage width and depth.
Make one adjustment at a time.
Move the speakers.
Listen.
Move them again.
Listen again.
When something sounds better, mark the location with a small piece of painter's tape.
You'll quickly begin narrowing down the sweet spot.
Small Changes Can Make Big Differences
One of the fascinating things about speaker placement is how little movement can sometimes be required.
You may find that moving both speakers:
2 inches forward
or
3 inches farther apart
or changing toe-in by only a few degrees completely changes the presentation.
This happens because you're changing how the speakers interact with the room.
That's why speaker placement shouldn't be treated as a one-time measurement.
Think of it as tuning your system to your room.
Vintage Speakers Especially Deserve Some Experimentation
Many classic speakers from the 1970s and 1980s were designed during an era when two-channel stereo listening was serious business.
Brands such as ADS, Advent, JBL, AR, KLH, Pioneer, Sansui, Norman Laboratories, and many others produced speakers capable of creating an impressive stereo image when positioned correctly.
Unfortunately, these speakers are often treated like furniture today.
They're pushed against a wall, placed directly on the floor, or squeezed into corners.
Give them some room.
Raise them to the proper height.
Experiment with their distance from the wall.
You might discover that the speaker you thought needed replacing simply needed to be positioned correctly.
A Simple Starting Setup
If you're not sure where to begin, try this:
Place the speakers approximately 6–8 feet apart.
Position them 18–24 inches away from the rear wall.
Keep them at least 18 inches from the side walls, if possible.
Position your listening chair approximately the same distance from the speakers as the speakers are from each other.
Raise the speakers so the tweeters are near seated ear level.
Start with only a slight amount of toe-in.
Now put on a familiar recording and begin making small adjustments.
Don't worry about whether the tape measure says the placement is perfect.
Listen.
Ultimately, the best speaker position isn't determined by a formula.
It's determined by your ears.
Before You Upgrade Your Equipment—Move Your Speakers
Audio enthusiasts love upgrades.
A different amplifier. New cables. Another cartridge. A bigger receiver. Different speakers.
And there's nothing wrong with that—we love vintage audio equipment as much as anyone.
But one of the biggest improvements available to your system may already be sitting in your room.
Sometimes all it takes is moving it six inches.
Proper speaker placement can improve bass definition, vocal clarity, stereo imaging, soundstage depth, and overall musical balance without changing a single component.
So before deciding your speakers aren't good enough, spend an afternoon experimenting with their placement.
You may be surprised at just how good your system already is.
From the Listening Room at Audiophile’s Closet
At Audiophile’s Closet, we believe great audio isn't just about owning great equipment. It's about getting the most from the equipment you own.
Vintage audio was built to be listened to—and when a properly restored receiver is paired with a great set of speakers and positioned correctly in the room, there's something about that classic two-channel experience that's difficult to duplicate.
Move them. Angle them. Raise them. Listen again.
Your room may be hiding more music than you realize.
Audiophile’s ClosetVintage sound. Timeless gear. Music the way it was meant to be heard.


Comments